Desktop Tips
Tip #804
March 31, 2026

Explore links on a web page without losing sight of the original tab.
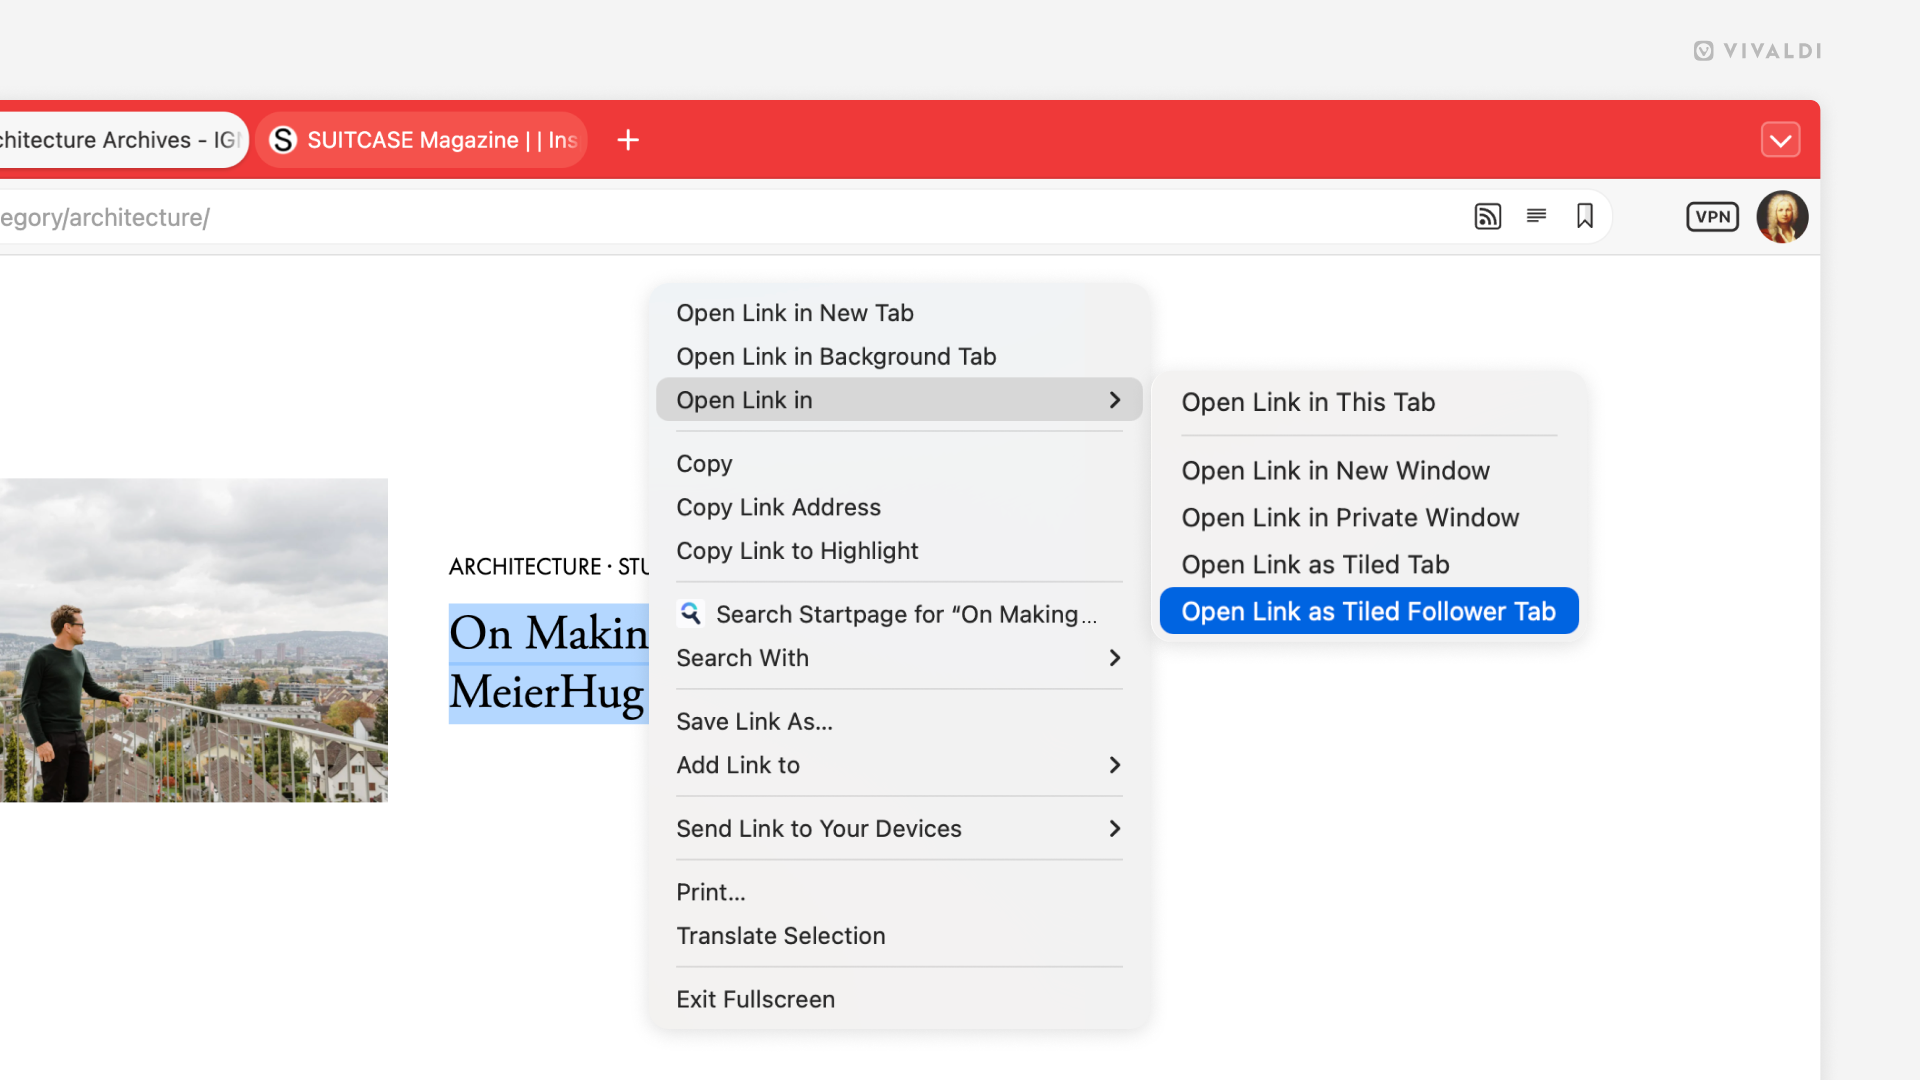
With the Follower Tab feature in Vivaldi, you can quickly preview everything you want and need to know about pages linked on the site you’re browsing. When you create a follower tab, it will open in a tiled tab next to the source tab and any other link you click in the source tab will replace the page in the follower tab.
To open the first link as a follower tab:
- Right-click on a link on a web page.
- Hover over the Open Link in option to open the sub-menu.
- Select Open Link as Tiled Follower Tab.
To open other links in the Follower Tab, simply click on a link on the web page as if you wanted to open it in the active tab.
Tip #802
March 24, 2026
A tab or a window – write your emails in the space you prefer.
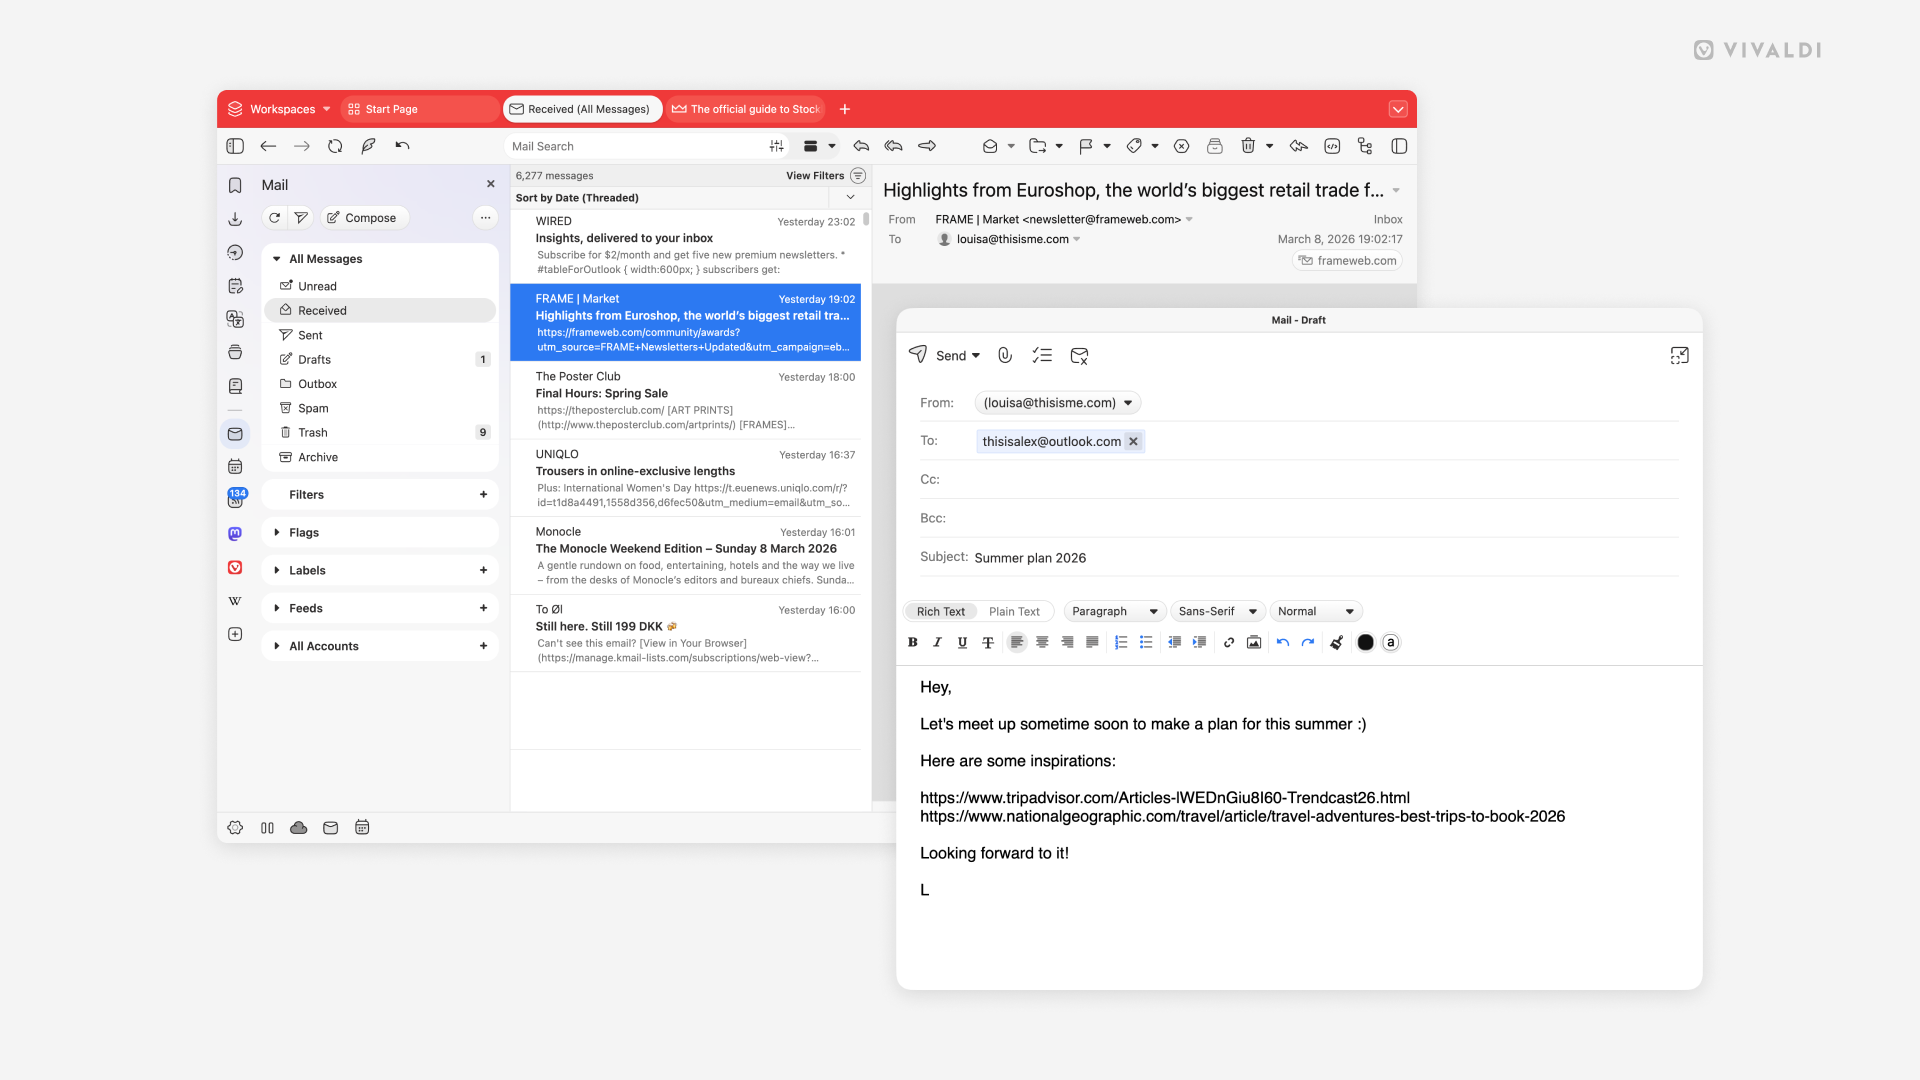
By default when you start writing a new message, or replying or forwarding an email in Vivaldi Mail, the composer will open in a new browser tab. But there’s also a composer window option available.
To enable the window option:
- Go to Settings > Mail > Mail Settings > Composer Window.
- Enable Open Composer in a window.
Tip #801
March 19, 2026
Enable automatic hiding of the browser’s user interface.
Automatically hiding the browser’s toolbars gives all the available space in the Vivaldi window to the page content. Whether the window is maximized or not. It’s great for those browsing on smaller screens and those, who prefer a more minimalist, distraction free experience.
To toggle Auto-hide on and off, use one of the following methods:
- Click the “Toggle Auto-hide” button on the Status Bar.
- Use the Keyboard Shortcut Ctrl+F11 / ⌘ F11.
- Type “Toggle UI Auto-hide” in Quick Commands.
- Go to the Vivaldi menu > Window > UI Auto-hide.
- Create a Mouse Gesture for the action.
- Go to Settings > Appearance > UI Auto-Hide and tick the box for “Enable UI Auto-hide”.
Tip #800
March 17, 2026
Skip Tab Stack naming prompts by disabling them in Settings.
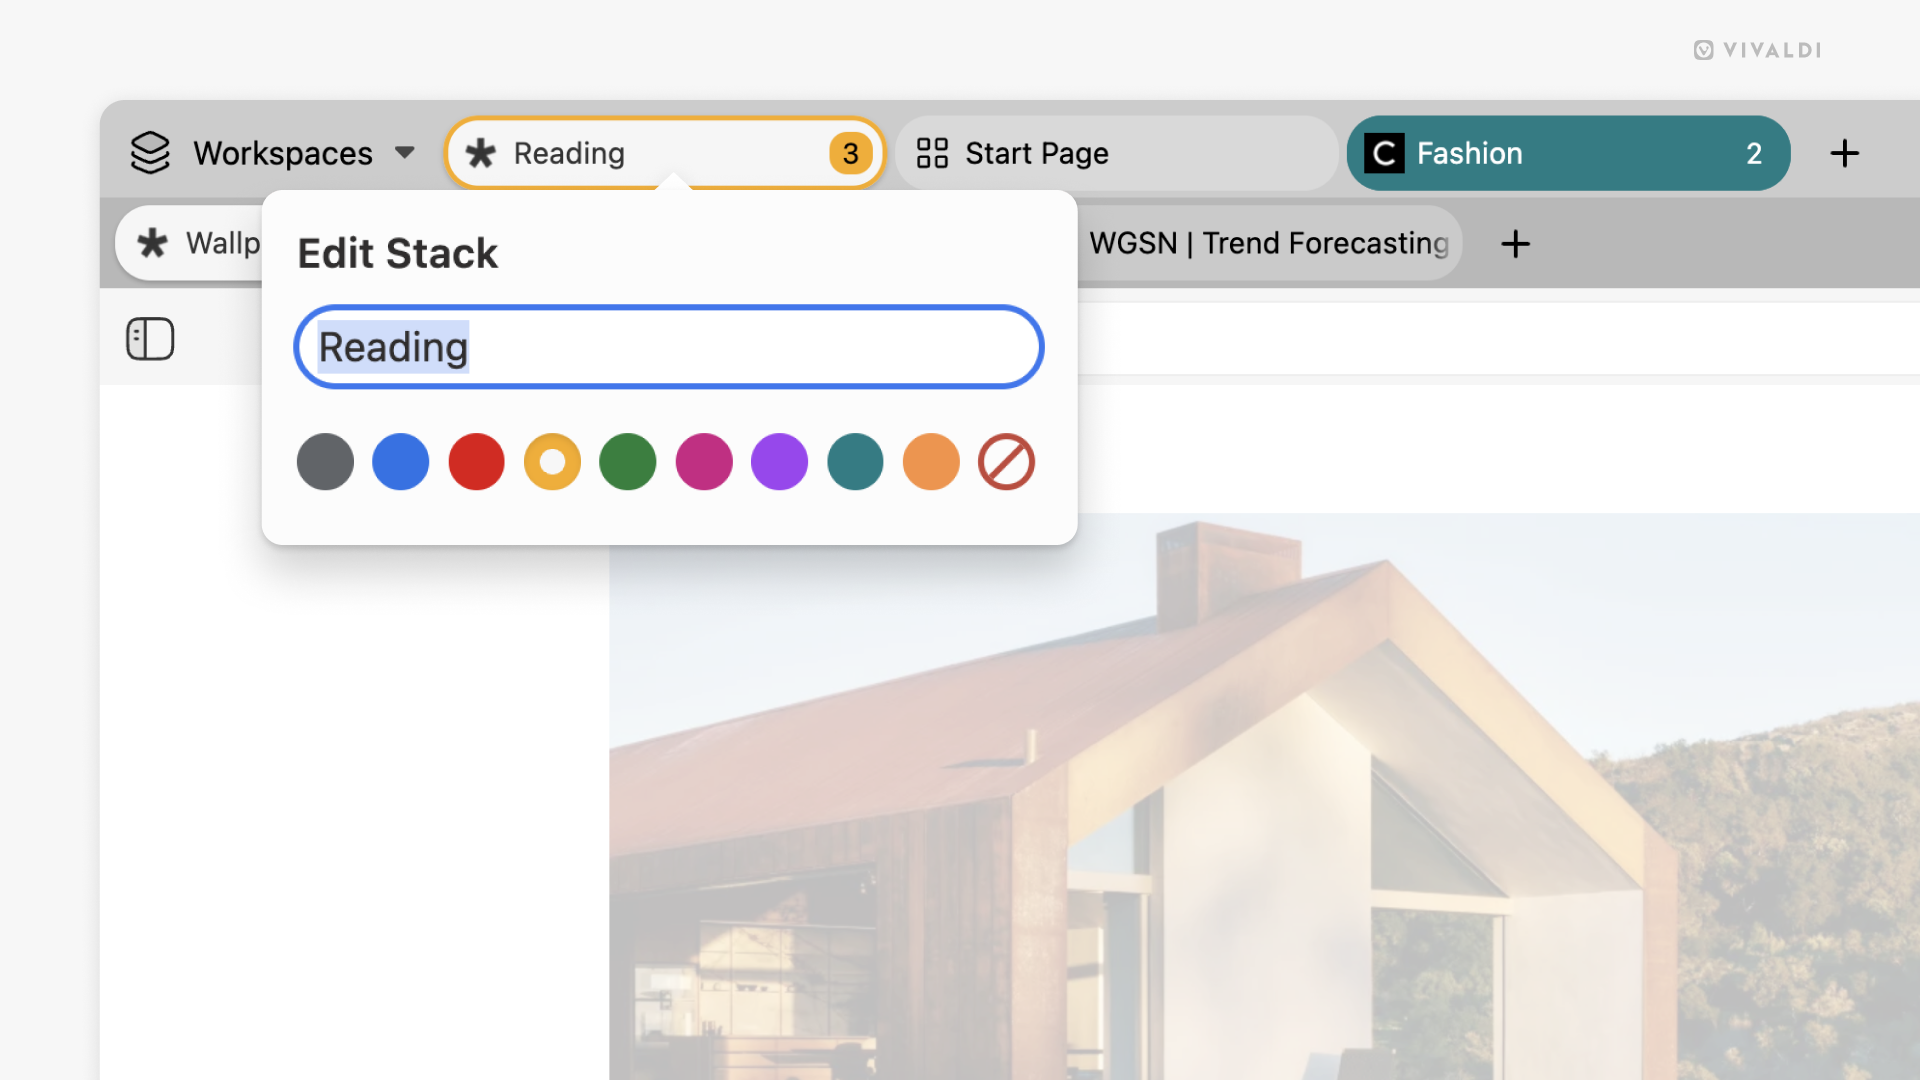
Giving your Tab Stacks names and adding a pop of color helps to keep things organized and allows you to locate the stacks faster. But not all stacks are created equal. Some live on your Tab Bar permanently and deserve a name, while others pop by for a brief visit. By default, every time you create a new Tab Stack, an editor will open, prompting you to give the stack a name and a color. If you don’t want to name every single stack you create, you can disable the prompt.
To disable the stack editor:
- Go to Settings > Tabs > Tab Features > Tab Stack Options.
- Disable “Auto-Open Stack Editor When Creating Stacks”.
When disabled, you can always edit a stack by:
- Right-clicking on the stack on the Tab Bar and selecting “Edit Stack…”.
- Typing “Edit Stack” in Quick Commands.
- Creating a Keyboard Shortcut or a Mouse Gesture for the action.
Tip #799
March 12, 2026
Use drag and drop to reorder Tiled Tabs.
Viewing multiple tabs side by side in the same Vivaldi browser window can significantly boost your productivity. By default, tiles follow the order of the tabs on your Tab Bar, but if that doesn’t work well, you can easily rearrange them.
To reorder Tiled Tabs:
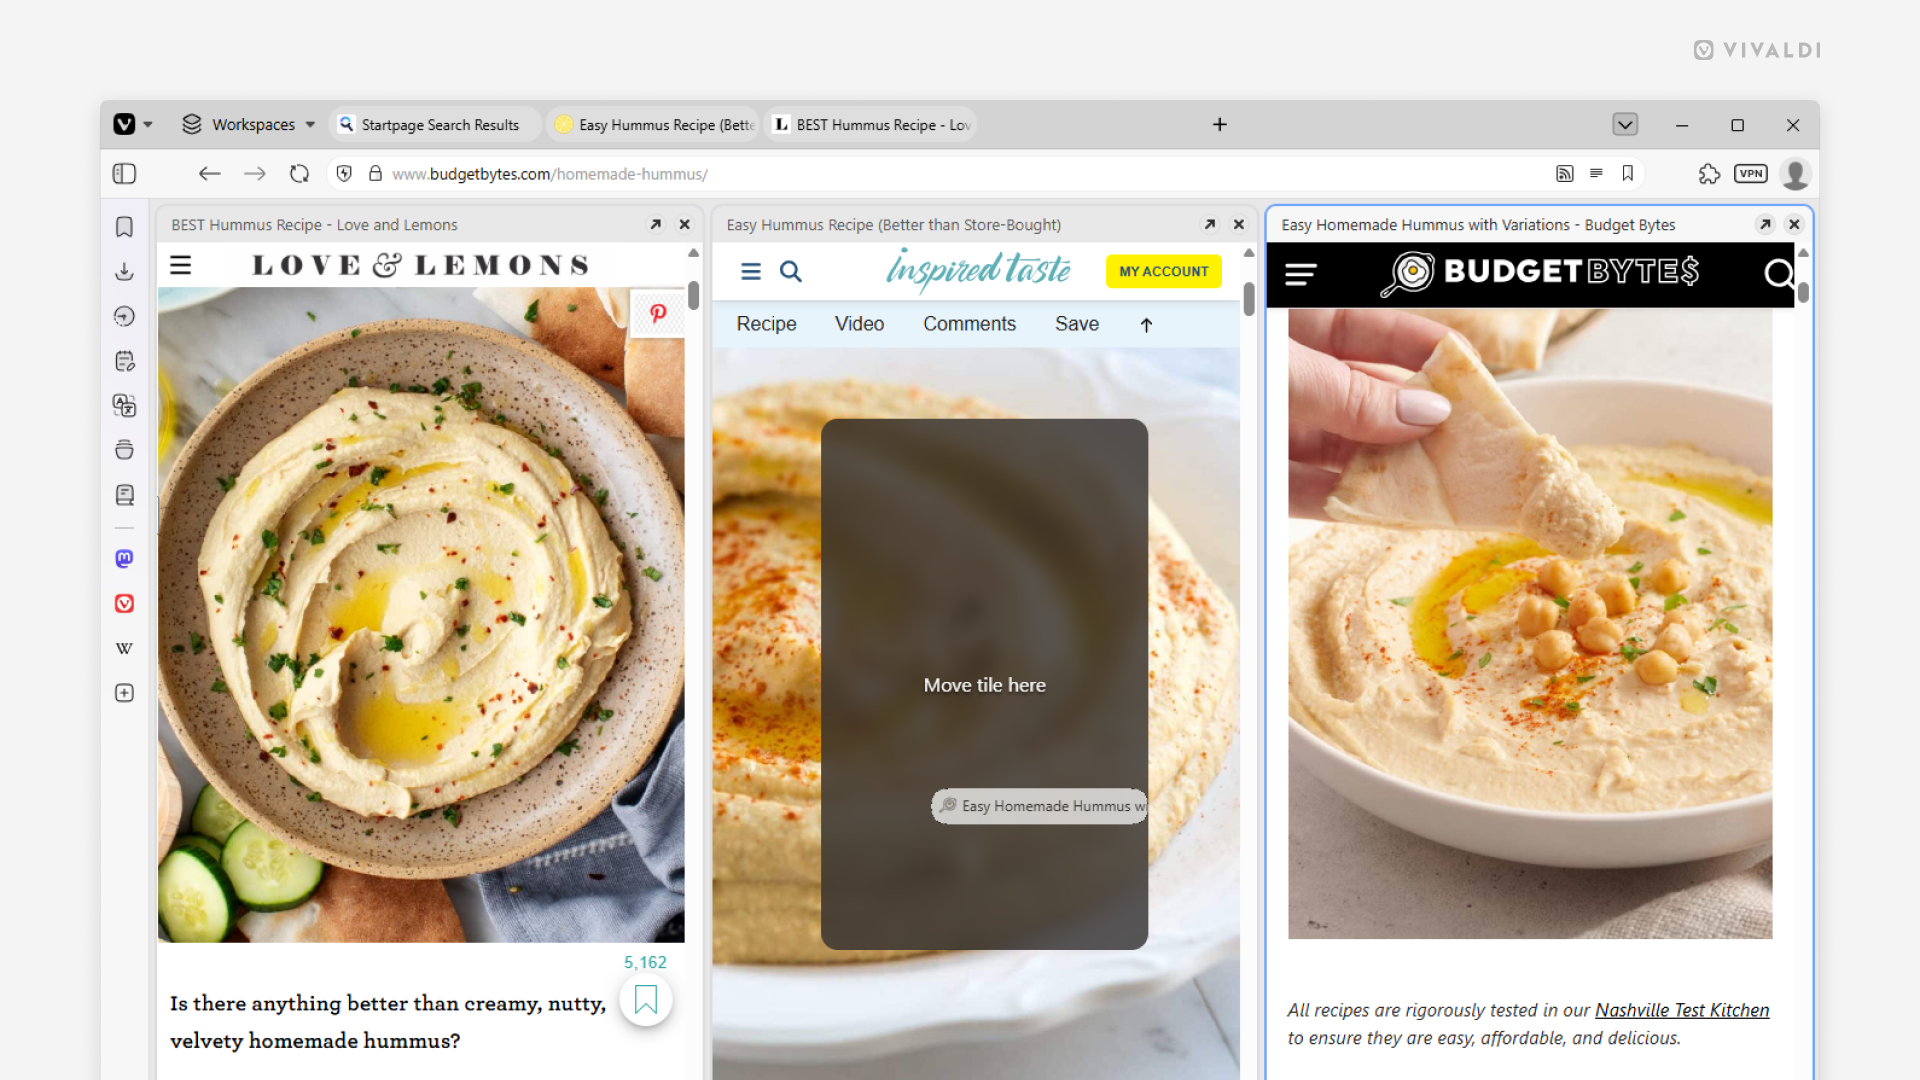
- Click on a tiled tab’s title bar in the tiled view and start dragging.
- Drag it to the middle of another tiled tab.
- When you see “Move tile here”, release the mouse button.
Tip #798
March 10, 2026
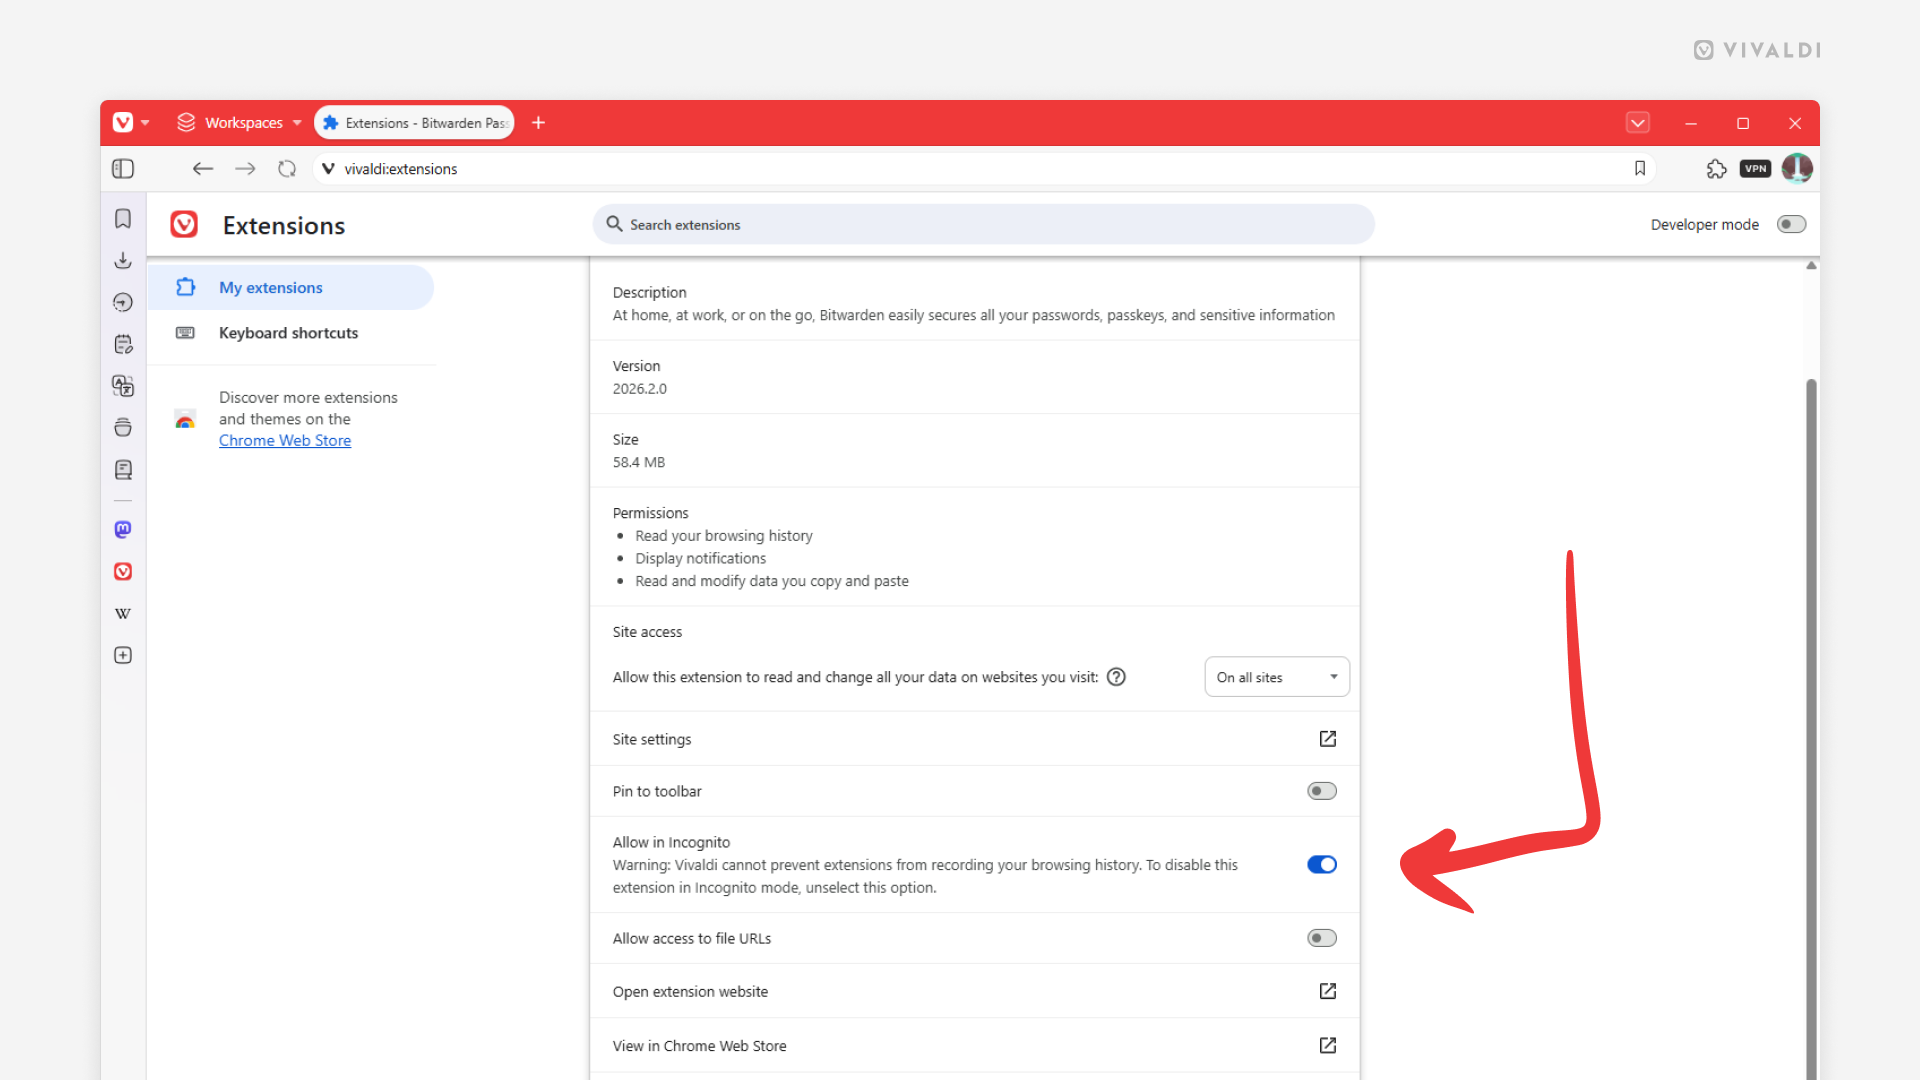
Allow the use of trusted Extensions in Private Windows.
For privacy and security reasons, Extensions added from the Chrome Web Store are not enabled by default in Private Windows. But if you want to use a trusted extension in incognito mode, you can enable it by following the steps below.
To enable an extension in Private Windows:
- Go to the Vivaldi menu > Tools > Extensions.
- Find the extension you want to use in Private Windows.
- Click on “Details”.
- Enable “Allow in Incognito”.
Tip #797
March 5, 2026
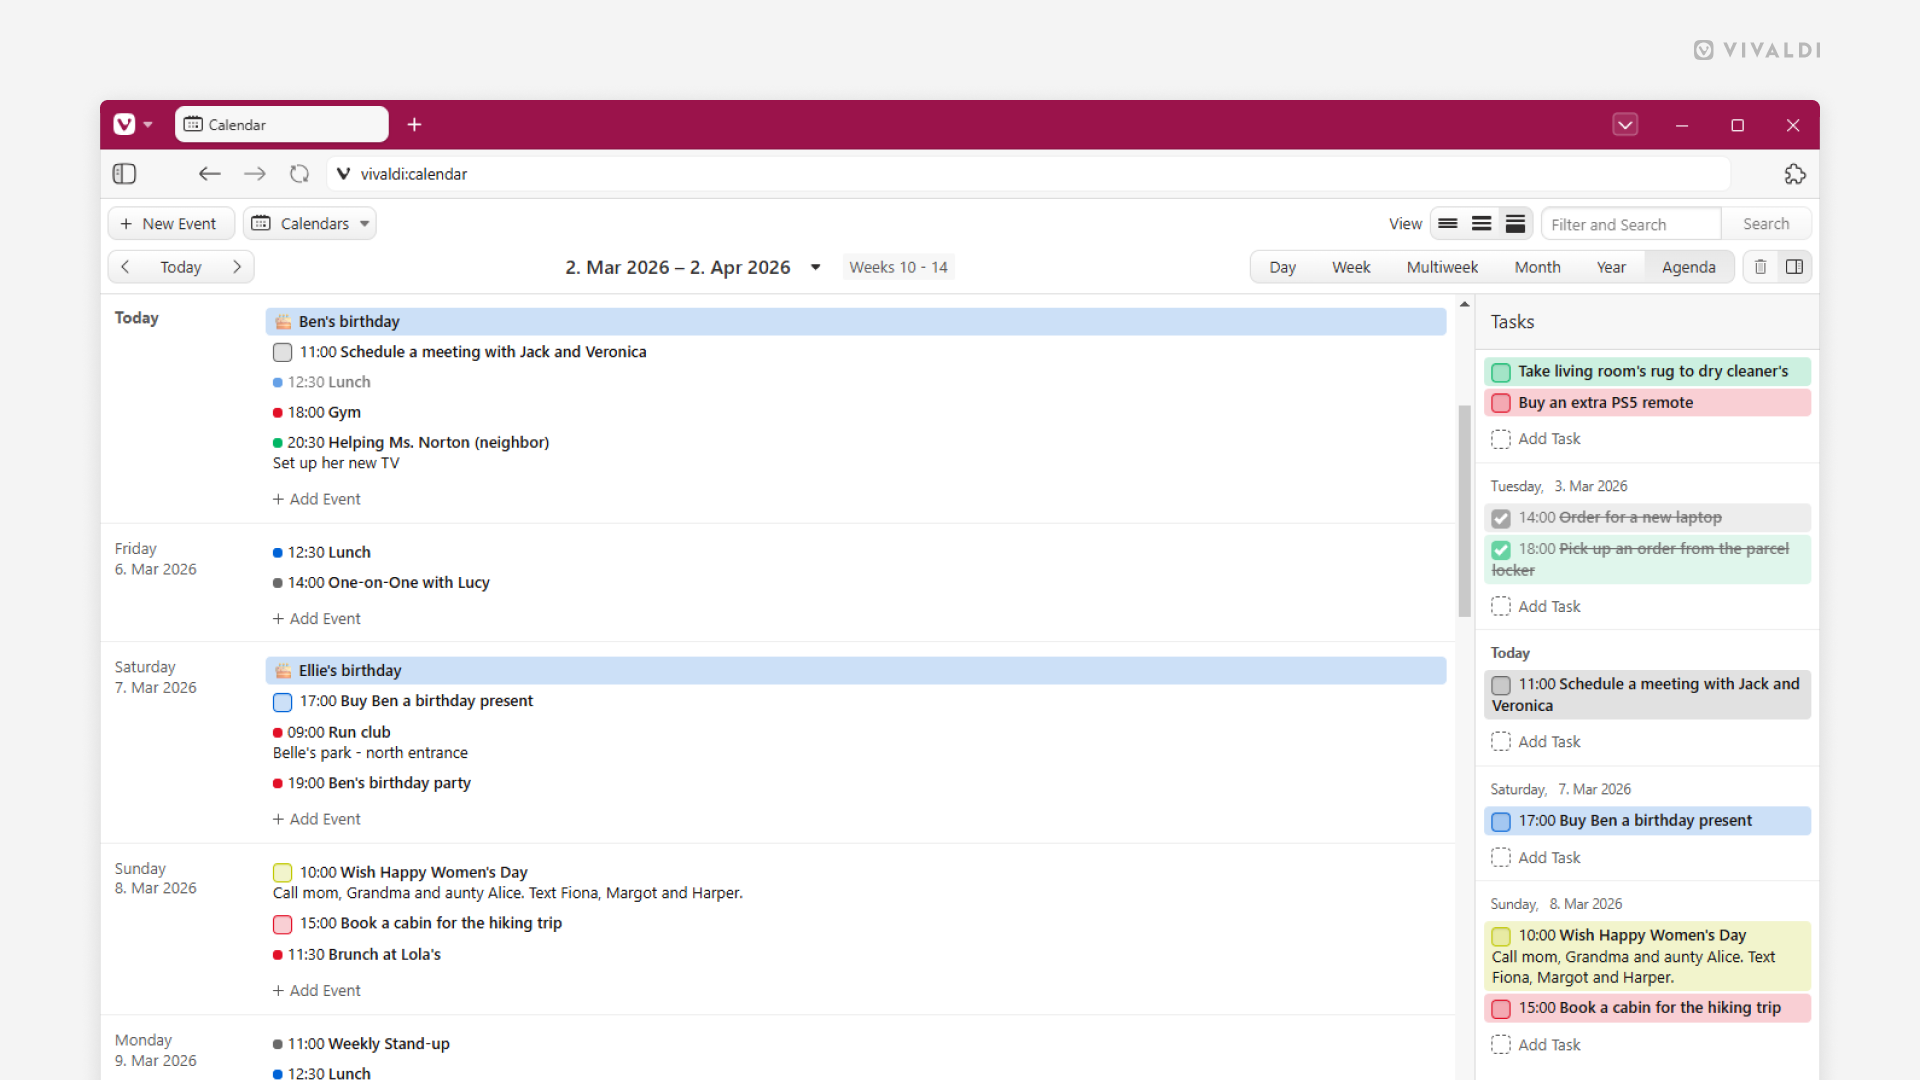
Get a clean chronological view of upcoming events and tasks in Vivaldi Calendar’s Agenda view.
While the day’s and week’s grid views in your Vivaldi Calendar are great for time-blocking, allowing you to visually organize your days and weeks, sometimes a linear list of the Agenda view is best to tackle those busy days. Just a simple chronological list of upcoming events and tasks that you can tackle one after the other.
To switch your calendar to Agenda view, look for the “Agenda” button on the calendar view menu in the top right corner of the page or simply press A on your keyboard (single-key shortcuts need to be enabled).
Tip #796
March 3, 2026
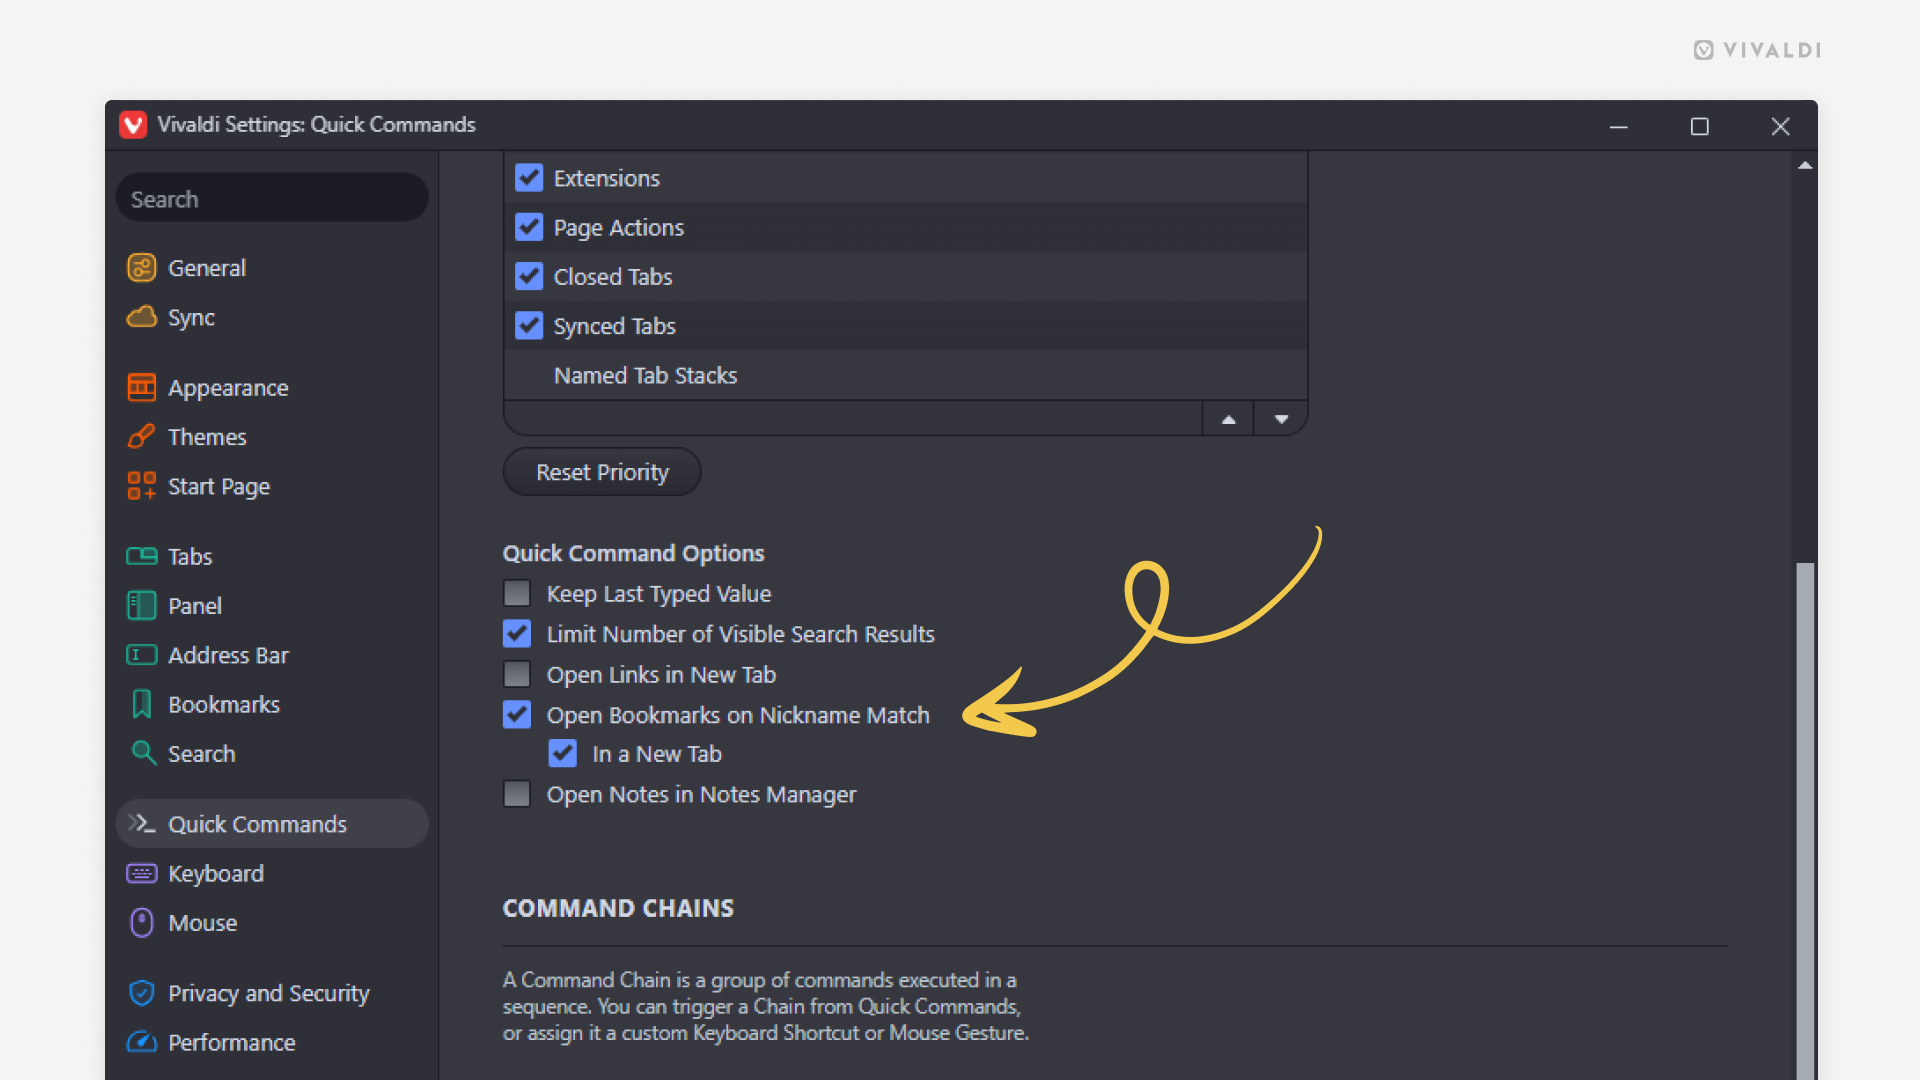
Open bookmarks automatically when the search keyword matches the bookmark nickname.
Bookmark Nicknames allow you to find bookmarks faster in the Bookmark Panel, Bookmark Manager, Address Bar and Quick Commands. To give your bookmark a nickname, edit the bookmark and type a word you associate with the bookmark in the Nickname field.
To enable automatic bookmark opening in Quick Commands:
- Go to Settings > Quick Commands > Quick Command Options.
- Enable “Open Bookmarks on Nickname Match”.
- Additionally, you can enable the option to open bookmarks in a new tab.
To open a bookmark:
- Open Quick Commands (F2 / ⌘ E).
- Type the full nickname.
Tip #793
February 17, 2026
Create a split-screen view by tiling tabs with drag and drop.
Instead of constantly switching back and forth between tabs, you can tile tabs to create a split-screen view. Tab Tiling lets you compare, reference, monitor, and think in parallel. There are a few different ways to tile tabs, but drag and drop is probably the easiest one.
To tile tabs:
- Have one of the tabs you want to tile open in the active tab.
- Find the other tab from the Tab Bar and start dragging it towards the page.
- Move the mouse to the side where you want the dragged tab to be in the tiled view – left, right, top or bottom.
- Release the mouse button to create a tiled view.
You can add more tabs to the tiled view with the same method.
Tip #791
February 10, 2026
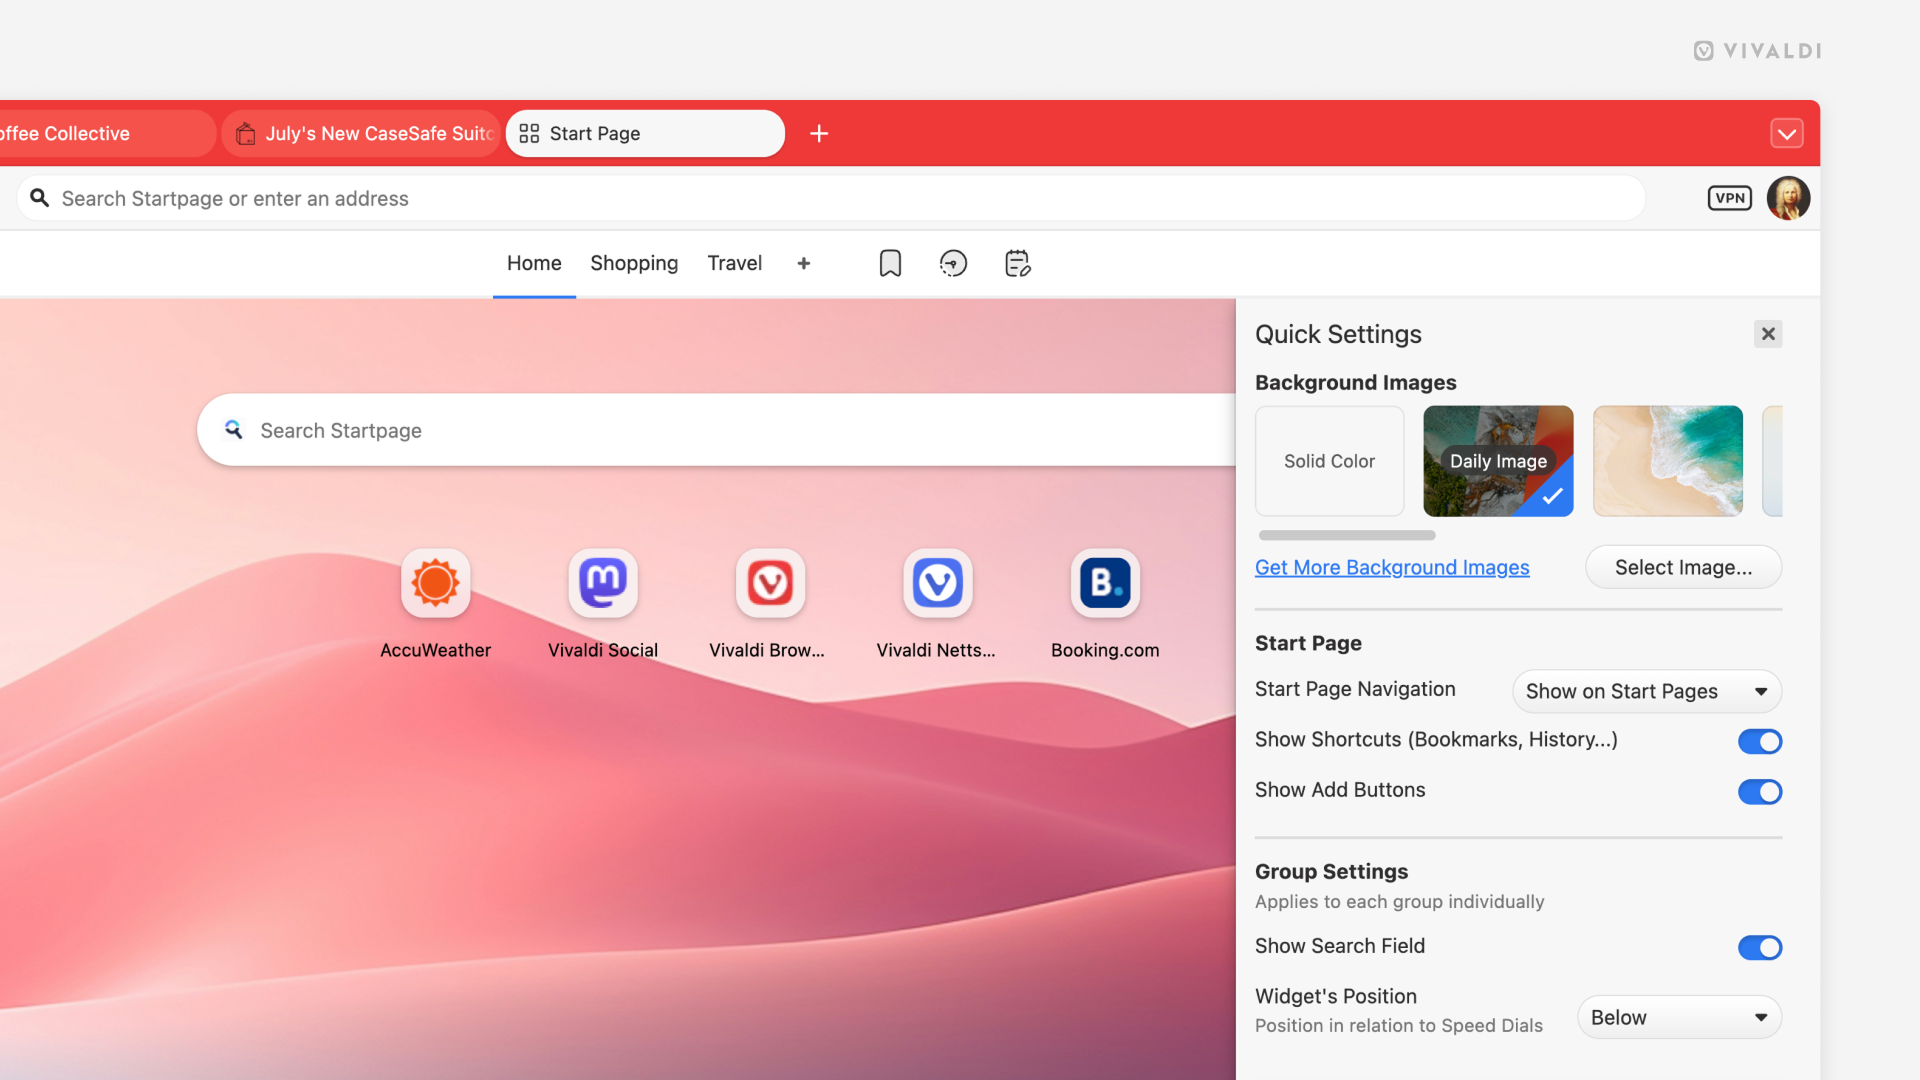
Get a new Start Page look every day with Daily Images.
When you open a new tab in Vivaldi, you likely see the Start Page with your favorite Speed Dials and Widgets. To give the Start Page some character, set a unique background for it. You can go for a solid color, select an image from the defaults, use your own image, or get a new automatically updated photo every day from Unsplash.
To enable Daily Images, either:
- Open Quick Settings from the top right corner of the Start Page and select “Daily Image” in the Background Image section.
- Go to Settings > Themes > Editor > Background and select “Daily Image”.
Tip #789
February 3, 2026
Tile a tab opened from a link with its parent tab in one move.
In a tiled view, you’ll have two or more tabs displayed simultaneously, allowing you to conveniently browse and compare content on multiple web pages at once. There are many ways to tile tabs, but if you’re about to open a link from a web page that you will be tiling with the active tab, follow the instructions below to cut this multi-step action down to just one step.
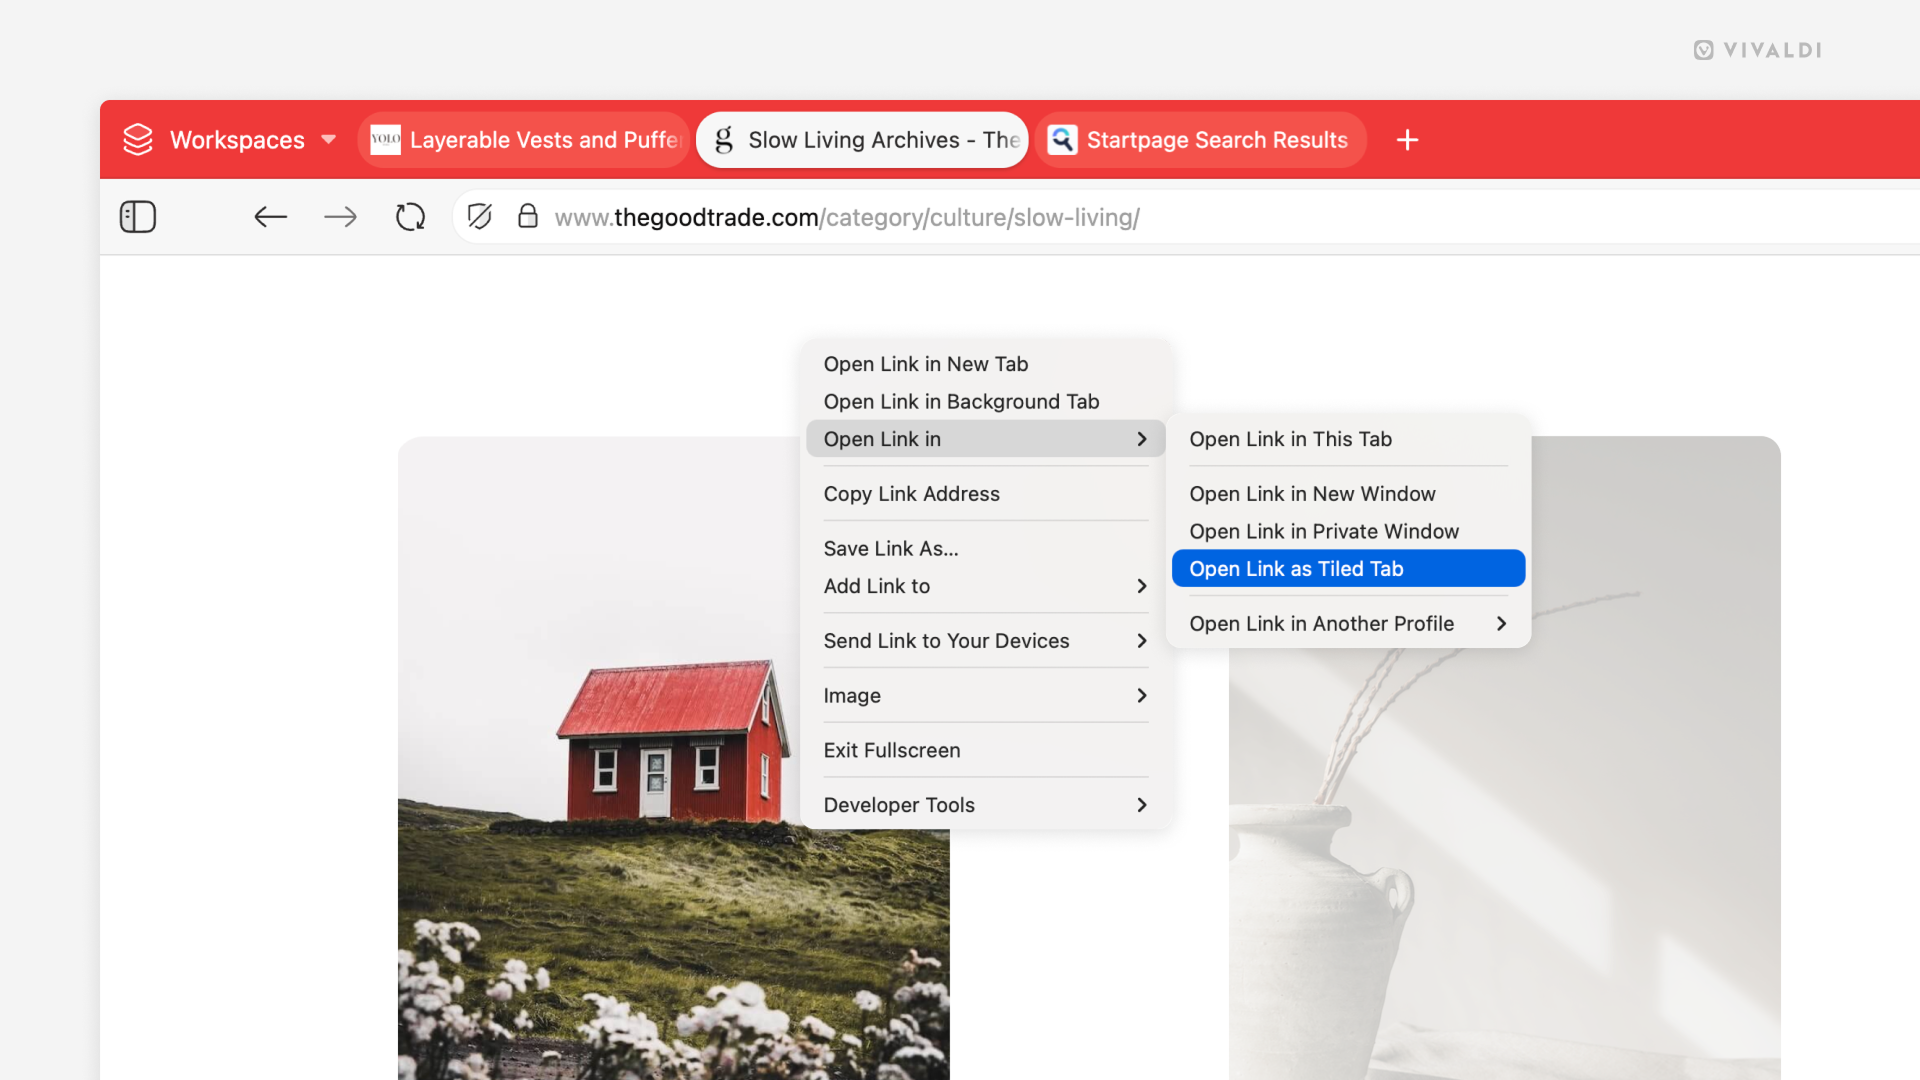
To create a tiled view from a link:
- Right-click on a link on the web page.
- Select Open Link In > Open Link as Tiled Tab.
When you do the same on an already tiled tab, the new tab will be added to the tiled view.
Tip #787
January 29, 2026
Restrict pinned tabs to the current site.
Pinning tabs allows you to keep your most-used tabs open and available in the same location at all times. But that doesn’t prevent you from straying from the originally pinned site. To make sure your pinned tabs stays on the site, you can restrict browsing in that tab to the pinned domain.
To keep the Pinned Tabs locked to the same domain:
- Right-click on the pinned tab.
- Select Restrict Pinned Tab to Current Site.
When enabled, all links from the same domain will open in the pinned tab and all links from other domains will open in new regular tabs.