Desktop Tips
Tip #284
May 25, 2023
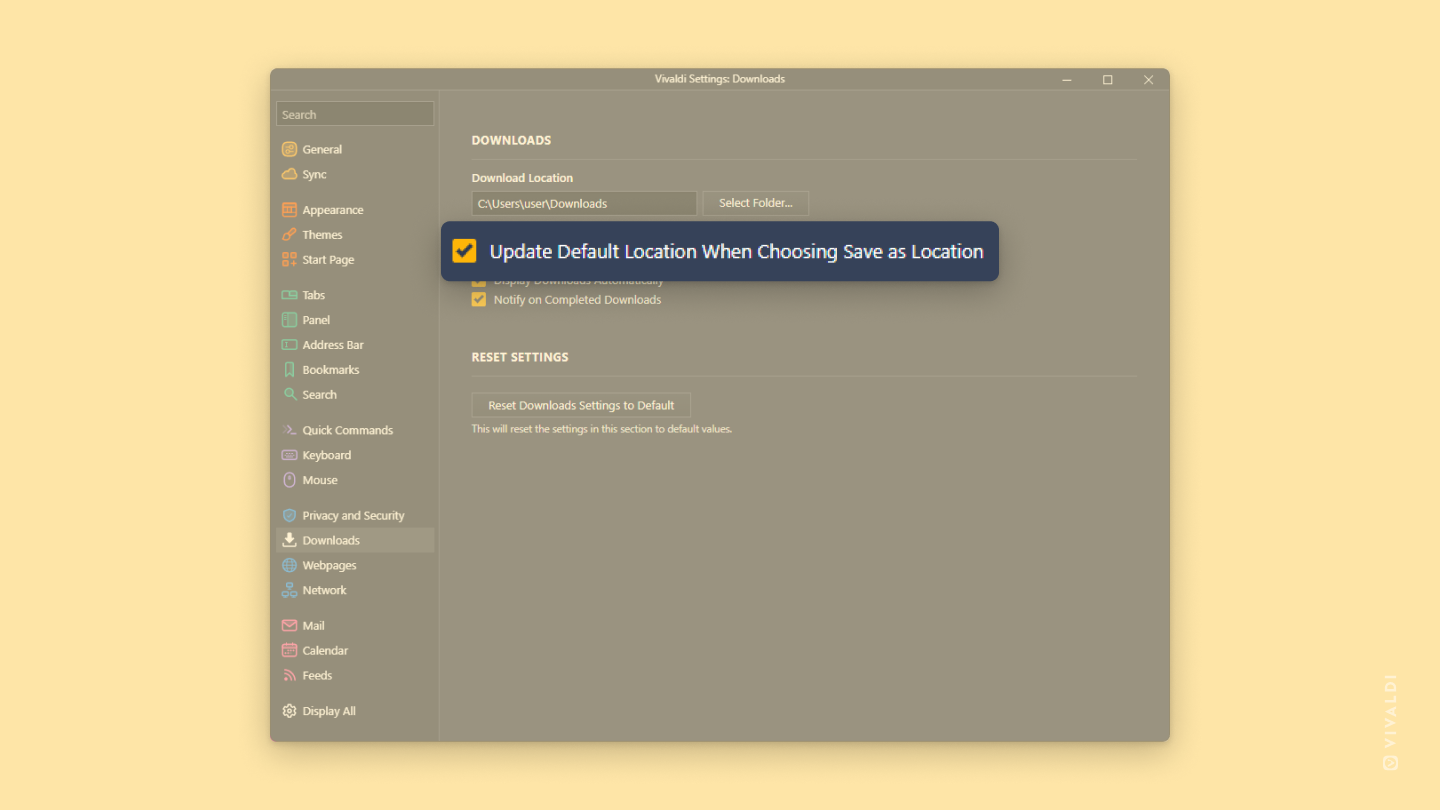
Skip download destination selection with multiple consecutive downloads by enabling default location updating.
Instead of saving all downloads in a single folder, you might prefer to select the most relevant download location for each file. But sometimes, when saving multiple files to the same location, having to choose the destination folder again and again can be tiring.
That’s why Vivaldi has a neat little setting, that updates the default download location whenever you save a file to a new location. That way, to download 10 similar files, you only have to select the destination folder once.
To enable it:
Tip #281
May 22, 2023
Duplicate the active tab and tile both in one step with Command Chains.
Do you regularly find yourself needing to work with content on the same page side by side? Normally you’d duplicate the tab first and then tile them, but with Vivaldi’s Command Chains, you can get to the tiled view much faster.
To set up this Command Chain:
- Go to Settings > Quick Commands > Command Chains.
- Add a new Command Chain.
- Add the following commands to the chain:
- Command 1 – Duplicate Selected Tabs.
- Command 2 – Tile Vertically/Horizontally.
- Create a Keyboard Shortcut, Mouse Gestures and/or add a custom button to a toolbar for executing the chain.
Straight out of the box, you can type the chain’s name in Quick Commands.
Tip originally shared by our community member Pesala on the Vivaldi Forum.
Tip #280
May 19, 2023
Create custom shortcuts for switching to the next and previous Workspace.
Whether you prefer to use Keyboard Shortcuts, Mouse Gestures or Quick Commands, Vivaldi has got you covered. There are countless customizable shortcuts for commands in Vivaldi, including for Workspaces, that you can use to browse faster.
To create custom Keyboard Shortcuts for switching Workspaces:
- Go to Settings > Keyboard > Workspaces.
- Place the mouse in the input field next to “Next Workspace” or “Previous Workspace”.
- Press the keys you want to use for the shortcut.
To create custom Mouse Gestures for switching Workspaces:
- Go to Settings > Mouse > Gesture Mapping.
- Click on
+New Gesture below the list of gestures. - Type “Next Workspace” or “Previous Workspace” in the search field.
- Click Next.
- In the highlighted box, while holding down the left mouse button, draw the gesture path.
- Click Save Gesture.
If you like to use Quick Commands, just type “Next Workspace” or “Previous Workspace” in Quick Commands menu and press Enter to switch Workspaces.
Tip #277
May 16, 2023
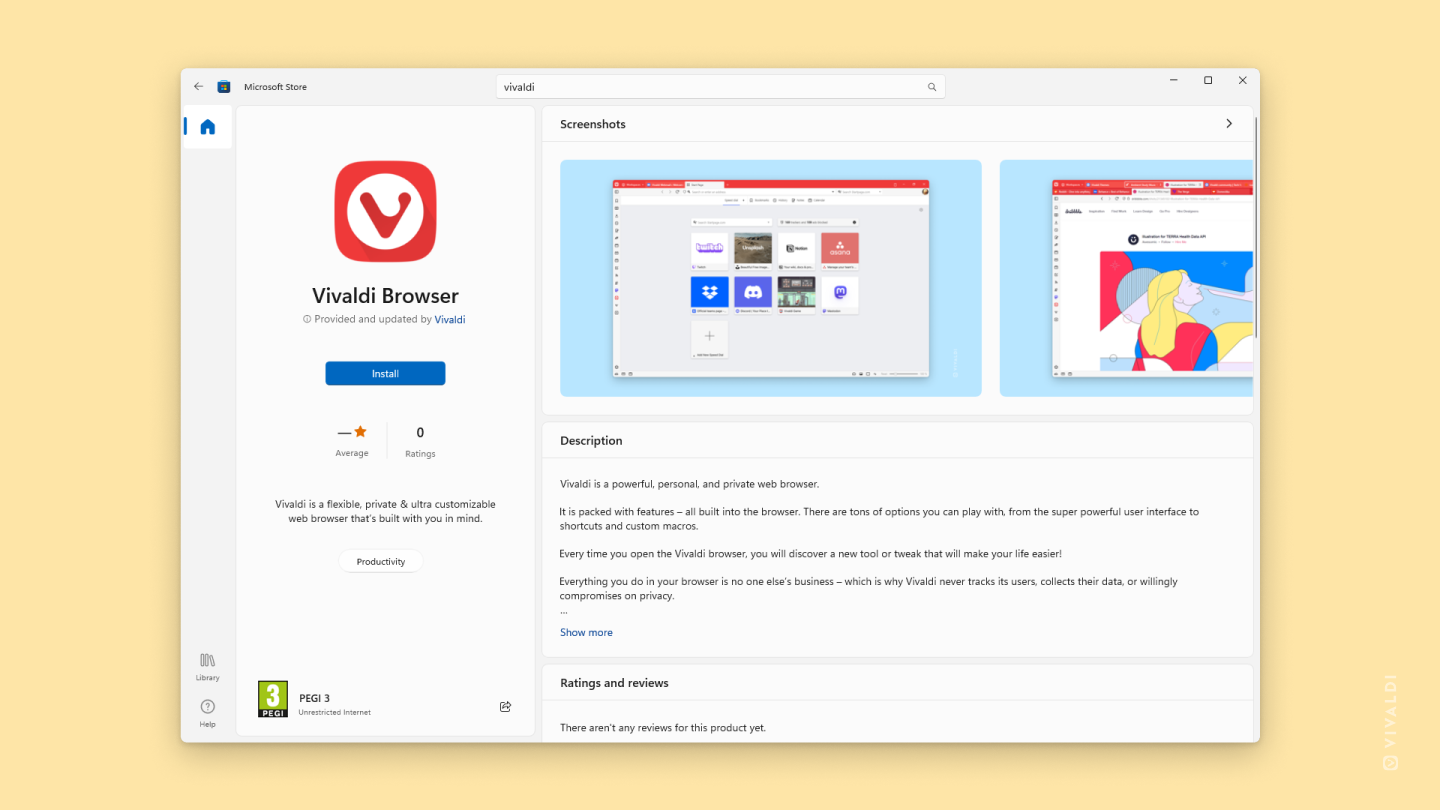
Install Vivaldi for Windows from Microsoft Store.
The best place to download Vivaldi for desktop is on vivaldi.com. If you can’t do that (e.g. you have Windows S Mode) or you prefer to install apps for Windows from their app store, you now have the option to install Vivaldi Browser also through the Microsoft Store.
To get it, search for “Vivaldi” in Microsoft Store on your Windows computer or click on “Get in Store app” on this link: https://apps.microsoft.com/store/detail/vivaldi-browser/XP99GVQDX7JPR4.
Tip #276
May 15, 2023
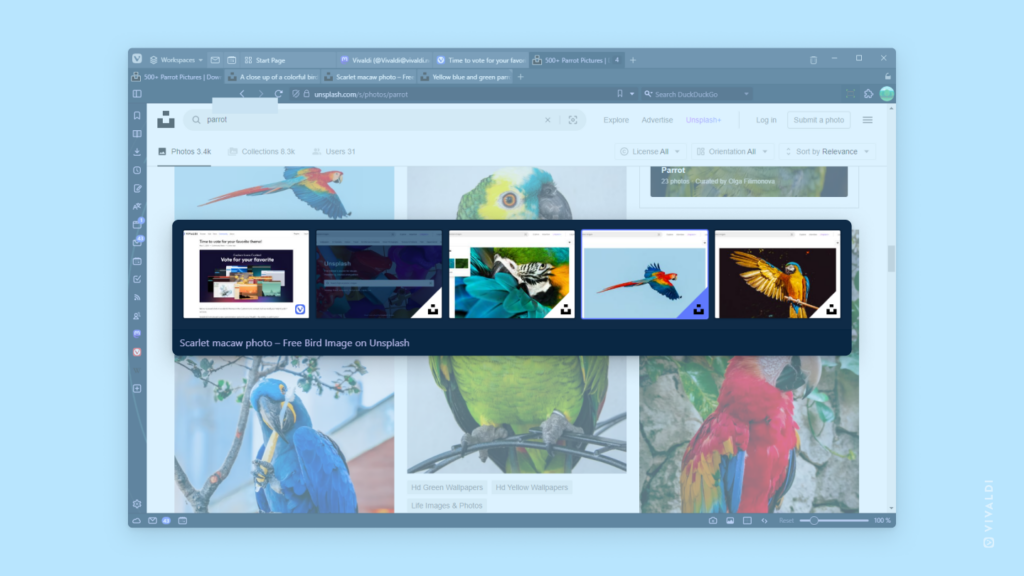
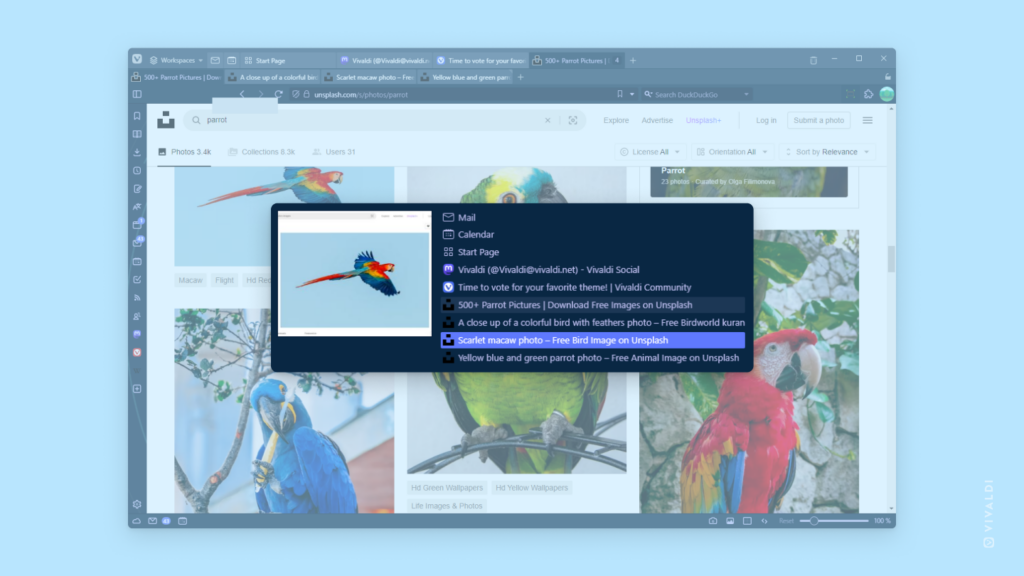
While cycling tabs with shortcuts, see a preview of tabs before switching to them by enabling the Tab Cycler.
You can cycle through open tabs with Keyboard Shortcuts Ctrl/⌘ + Tab and Ctrl/⌘ + Shift + Tab or by scrolling with the mouse wheel while holding down the right mouse button (see how in Tip #53). By default, as soon as you use the shortcut it will switch to the next tab, but you can also get a preview with the Tab Cycler before making the switch.
To enable the Tab Cycler:
- Go to Settings > Tabs > Tab Features > Tab Cycling.
- Enable Show Tab Cycler.
When the Tab Cycler has been enabled, you can also decide whether to display multiple tab previews at once or see the open tabs as a list and the preview of only the highlighted tab.
Tip #275
May 12, 2023
Make the Pop-Out Video window as big or small as you like.
Moving a video into an independent floating window is a good way to keep browsing the web while glancing at the video from the corner of your eye. Depending on how much space you have on your screen, you might want to make the video bigger or smaller.
To resize Pop-Out Video window:
- Move the mouse cursor to the edge of the video window.
- When you see a double headed arrow ↔ , click and drag to resize it.
Tip #274
May 11, 2023
Open a new browser window with a keyboard shortcut.
There are a few ways you can open a new window in Vivaldi, For example, by clicking a button on the Tab Bar, from the File menu, through Quick Commands, etc. One of the more common ways to open a new window, though, is to use Keyboard Shortcuts.
- To open a new window, press
Ctrl + Non Windows and Linux, and⌘ Non macOS. - To open a new private window, press
Ctrl + Shift + Non Windows and Linux, and⌘ Shift Non macOS.
Tip #271
May 8, 2023
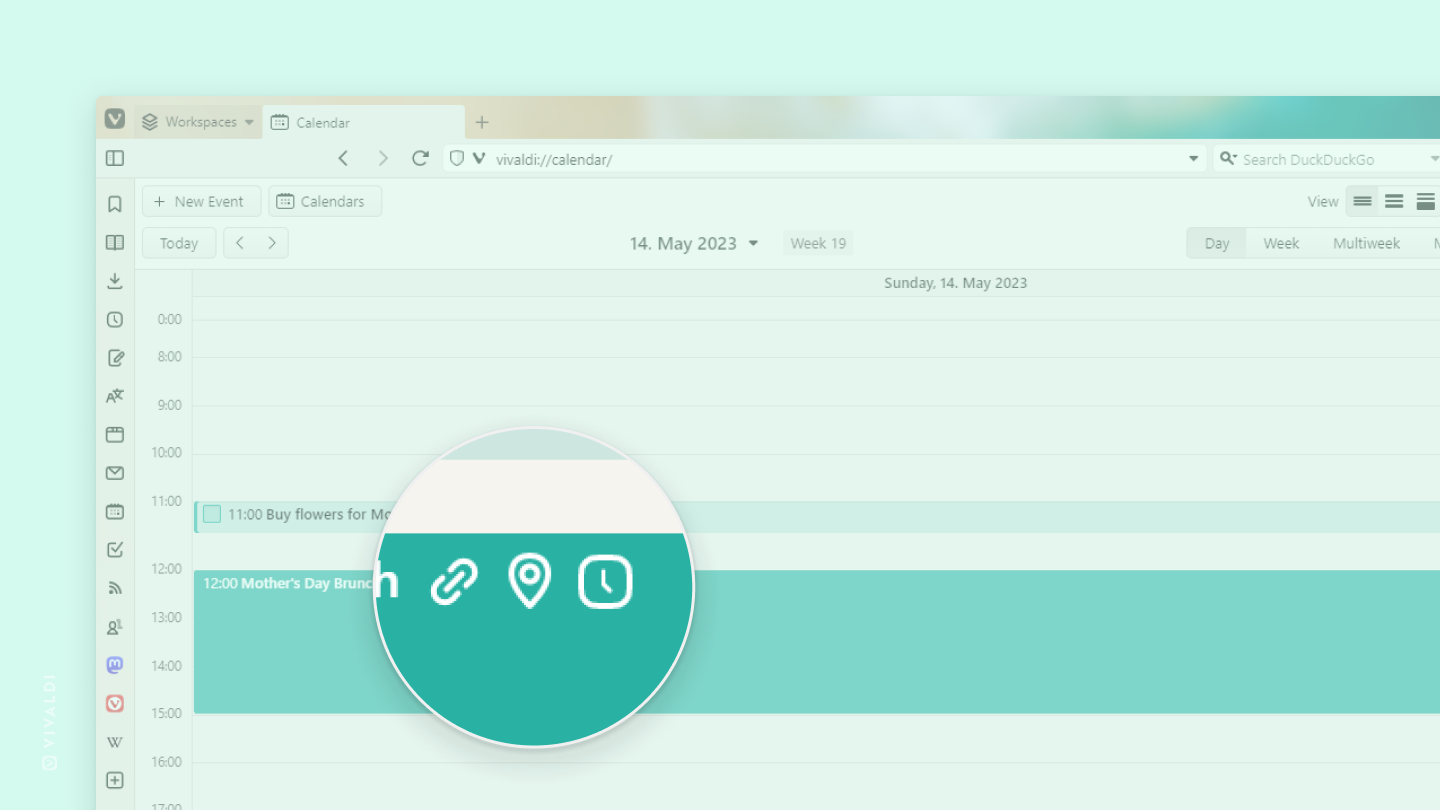
Make it easier to see which Calendar events have additional information by enabling event property icons.
Especially useful with Vivaldi Calendar’s Minimal View, but handy in all views, event property icons for links, location, reminders and recurrence let you know at a glance what type of additional information the event includes.
To enable the icons:
- Go to Settings > Calendar > Calendar Display.
- Enable “Show Event Property Icons”.
Tip #267
May 2, 2023
Press Ctrl + F11 / ⌘ F10 to hide Vivaldi Browser’s user interface.
You can hide the browser’s toolbars by enabling Full Screen view, but that maximizes the window and you’re not able to view the OS’ Task Bar or other open apps. As an alternative, you can just hide all toolbars and have the browser window as big or small as you want.
To quickly toggle Vivaldi’s user interface off and on, use the Keyboard Shortcut Ctrl+F11 / ⌘ F10.
Alternatively, use the following options:
- Go to the Vivaldi menu > Window > Hide UI.
- Type “Toggle UI” in Quick Commands.
- Create a Mouse Gesture for the action.
Tip #266
April 28, 2023
Switch Workspaces with one click with the aid of Command Chains, Toolbar Editor and Custom Icons.
There are some unique ways you can use different Vivaldi features together to make the browser behave the way you want it. For example, with the help of Command Chains, Toolbar Editor and Custom Icons you can take Workspaces to the next level. Here’s how:
Step 1 – Create Command Chains for switching Workspaces.
- Go to Settings > Quick Commands > Command Chains.
- Create a new chain and give it a name.
- Replace the placeholder command with “Switch to Workspace #”. The number corresponds to the order in which you created your Workspaces.
Create a chain for every workspace. In each chain, you can also add other commands that will be executed at the same time. For example, add the command “Switch to theme” to make workspaces visually more different.
Step 2 – Add Command Chain buttons to a toolbar.
- Open the Toolbar Editor.
- Select the Command Chains section.
- Drag the buttons you made for Workspaces to a toolbar of your choice.
Step 3 – Add Custom Icons.
By default all Command Chain buttons looks the same, but you can add Custom Icons to make each button stand out.
- Go to Settings > Themes > Editor > Icons.
- In the list of icons, find the Command Chains you created.
- Select one and replace the default icon with one you’ve created.
For a more in depth description of this feature combination and final results, take a look at our blog post and video here.
Tip #265
April 27, 2023
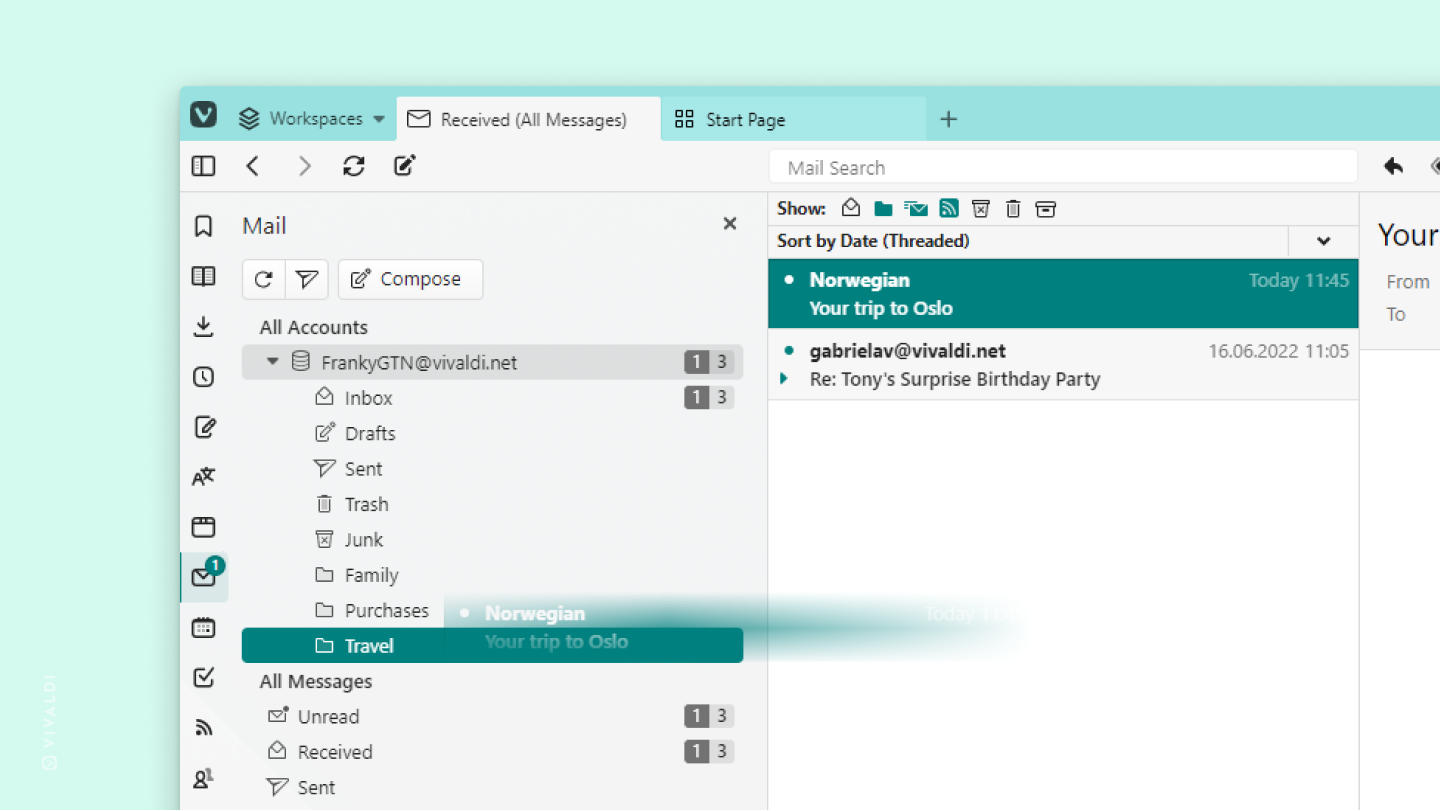
Move Mail messages with drag and drop.
With endless emails flooding your mailbox, moving messages to dedicated folders, assigning flags and labels to them, and marking tackled messages as read helps to keep things neat and easy to find later. Working with messages using the right-click context menus or shortcuts are excellent ways to manage your messages, but since Vivaldi 6.0 a quick drag and drop can get things done as well.
To move a message, change its read state or assign a property to it:
- Click and hold down the left mouse button on the message you want to move.
- Drag the message to the desired view in the Mail Panel.
- Release the left mouse button to finish the action.
Tip #264
April 26, 2023
Select text on a page before opening Find in Page to prefill the search field.
When there’s too much content on a page to read it all, you can search through the text with Find in Page.
To open Find in Page’s search field:
- Use a Keyboard Shortcut
Ctrl / ⌘ + F. - Go to the Vivaldi menu > Edit > Find in Page.
- Open Quick Commands and type “Find in page“.
- Use a Mouse Gesture (create one in Settings first).
If you’ve already come across the keyword you want to search for on the page, select the keyword (or phrase) and only then open Find in Page. That way you can get to the results immediately, without needing to type the search term manually.